
It’s a simple task, experts say, although one mistake and you could electrocute yourself. But don’t worry: this step by step will give you all the instructions to achieve it without problems on your own. Let the light come.
Donate for a meme. On the one hand, the Renaissance man, Da Vinci type, capable of wandering in multiple disciplines, from painting to architecture, from physics to astronomy, from philosophy to poetry. On the other, the postmodern man, who at the first domestic damage has no choice but to call a chasquilla master. What would Grandpa say? Grandmother? The father?
It will be the fault of an education that has changed multidisciplinarity for specialization, and of a model of life that values comfort and perfection – whatever those concepts mean – rather than the immanent possibility of harm.
Isn’t it better to be prepared and armed with knowledge, techniques or practices, to face the eventualities that can arise at home? After all, how difficult can it be to seal the bathroom, fix a broken piece of furniture or put a lamp in the living room?
The latter — installing a lamp on the ceiling — can be “very simple,” says Axel Maldonado, a construction professor at Duoc UC Alameda. Of course, as simple as it is, it is not without danger: “You have to understand that electricity is a serious matter, and that if you are not careful when handling it, you run serious risks. “warns the specialist.

In 2020, in full containment due to the covid-19 pandemic, the SERNAC and the Superintendence of Electricity and Fuels warned of the increased risk of accidents due to improper use of electrical products in the home. Of course, most of the recorded cases (61%) were concentrated in girls and boys under the age of five. Among the main recommendations is to check that the electrical products purchased have the SEC security seal do not overload sockets, follow the manufacturer’s instructions and do not touch anything electrical without taking the necessary precautions.
All these recommendations are more than enough when we are thinking of installing a lamp ourselves. By taking the necessary precautions, performing the task should not be so complicated, as Maldonado pointed out.
some previous information
The electrical energy we have at home is distributed by the Lighting Distribution Board (TDA). In it are concentrated the thermomagnetic protections and the differential switches, better known under the name of “automatic”, devices dedicated to the protection of the installation and its components as well as of people.
Maldonado explains that the internal distribution of an electrical panel is designed according to the number of components, electrical devices or “loads” that each installation has. “This value is expressed in amperes and is associated with switches or automation,” he says.
Generally, the capacities vary between 10, 16 and 25 amps. “It will depend on the size of the installation and the number of components.” The function of the TDA is therefore to “concentrate all the electrical protections of the installation or enclosure to which it belongs” and to do so in an orderly and safe manner, as defined by the SEC regulations in force.
Master snap: basic guide to understanding the electrical circuit
In more modern homes or electrical installations, an ADT should have three types of switches (and look like the picture below). On the one hand, the Power Control Switch (ICP), on the other hand a Differential Switch (ID), then the Small Automatic Switches (PIA). What is everyone working on?

PCI: prevents damage to the installation in the event of an overload and checks that the power used is not greater than that subscribed. When this is exceeded, it switches off automatically.
IDENTIFIER: As we have already described, it is used to disconnect the electrical installation in the event of an earth leakage. This prevents a person from being electrocuted if they touch the current or a device in poor condition.
AIP: These are the sectorized switches for each of the interior circuits of the house. They separately control the arrival of electricity in the different spaces. There is usually one for lighting, another for high power sockets and another for low consumption sockets, with different values that vary between 10A, 16A, 20A and 25A.
phase, neutral, earth
Today, every electrical installation in the house is supplied with energy by cables, through which alternating current is transmitted. This is relevant, because it’s very common to hear people – and even experts – talk about positive, negative and ground wires. This is false, because, as Axel Maldonado explains, these concepts correspond to direct current, which is the one used by small devices, such as smartphones and laptops, and whose characteristics differ from alternating current. As a result, the way security is approached is also changing.
What corresponds, in this case, is to speak of phase, neutral and earth. The phase cable corresponds to the active conductor, which carries the electrical current from the network to an outlet, plug or switch in the house, under a voltage of 220 volts (V).
The neutral wire, on the other hand, provides a return path for the electric current flowing through the circuit, while the ground is used as a safe return conductor for the electric current in the event of a fault or short circuit.
Earthing or earthing is based on the installation of a copper stake, known as a Cooper bar, about one meter long, which is buried in an area near the TDA. “It’s a very important aspect to consider in all of our homes, because it’s how we protect people from these dangerous releases,” says Maldonado.
The problem is that although Chilean regulations require every residence to have a ground connection, many homes still do not. This means that the risk of suffering an electrical accident, whether it is a discharge from materials handling equipment, or an overheating of a component – which can easily cause a fire – increases considerably.
For the same reason, if you do not have an earth connection in your home, it is better not to try to do any electrical installations yourself. And go to an authorized technical service to regularize the situation. “The ground wire is too important and people’s safety depends on it,” insists Maldonado.
install a lamp
What tools will you need?
- Screwdriver “They have to make sure they have rubber grips, so that in the event of an accident, there is no risk of electrocution,” advises Maldonado.
- Drill : to drill the ceiling. Ideally with a hammer, because that’s how we make sure it can penetrate any material. For tips on choosing a good drill, check out this article.
- pegs : fundamental to fix the screws to the ceiling.
- Screws : often the lamps include them, but it is worth paying attention to the diameter of their holes so that the screws fit perfectly.
- pliers : the best for this type of task are the pointed or stork pincers, whose pincers are elongated and flat. This allows for easier cable management.
- Hammer :
- insulating tape :
Step by step:
- Safety first : you must lower the automatic that activates the electric current in the sector of the house in which you will make the installation. If you don’t know what it is, try one by one until you can’t turn on the light anymore. Or, turn off all the power at home and you’re done.
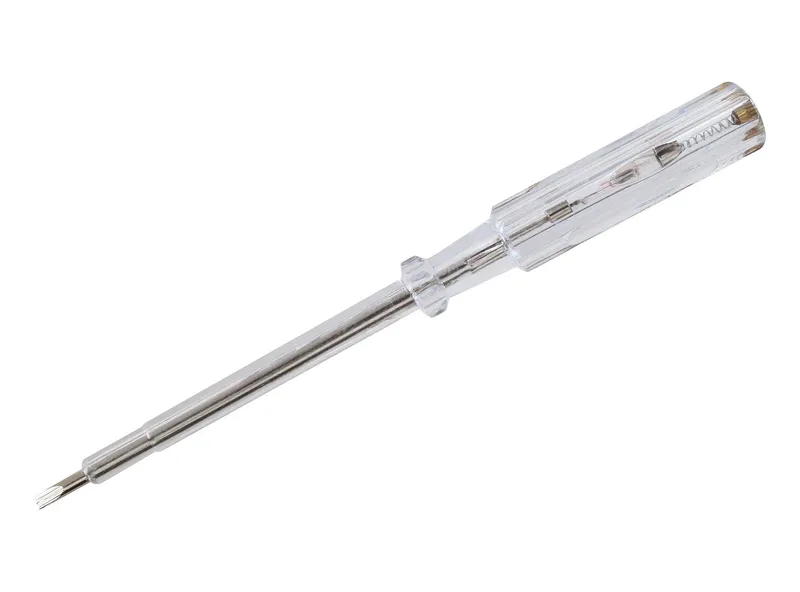
- You can check using a screwdriver with a homing head that, indeed, the electrical energy does not pass through the cables of the house that you are going to handle.
4″ Schneider Bus Driver
- Once you have identified the place where you will install it, you must make the holes in the ceiling or “sky”, which will allow you to screw the lamp there.
- To do this, you must use the lamp holder to make the corresponding measurement. With a pencil you can mark the points that you will then have to drill with a drill.
- Remember that the bit to be used with the drill must be the exact size for installing the dowels (which are also usually included in the lamp set or kit). A little wider than the stud will cause the stud to fall from the ceiling, while a little too small will not allow the stud to enter.
- Once the holes are drilled, hammer in the dowels and make sure they are firmly fixed to the sky.
- After that, he proceeds to screw the lamp onto the dowels. If you own or have access to a drill/driver, you can use one and make sure the lamp is securely attached to the ceiling.
Once the first part of the installation is done, we move on to the electrical part (the most difficult):
- Generally, lamps have three cables: one corresponding to the phase, another to the neutral and a third to the ground. However, on some occasions, they only have two: one phase and the other neutral.
- The idea is to connect the phase cable of the lamp to the phase cable of the house. The same must be done with the neutral and ground wires.
How to distinguish one from the other?
Just follow the corresponding colors. For the hot wire, there are four color options: black, gray, brown or white. Neutral, on the other hand, is always blue, while ground is either green or yellow. In some cases, the devices to be installed also include an iconography to differentiate the cables: the “L” corresponds to the phase and the “N” to the neutral.
- Next, splice each wire to its respective pair using a pair of pliers. You must first “peel” them -remove the plastic cover-, leave the fiber exposed and join it by sealing it with insulating tape. Remember Axel Maldonado’s recommendation to prefer tools with rubber handles, to avoid an electrical accident.
- In some cases, the electrical cables are anchored to a power strip, terminal block or terminal block, which is a type of electrical connector, which offers greater security both in the handling of the cables and in their maintenance.
- If the lamp doesn’t have a ground wire, but your house does, you need to insulate it by covering its copper wire with electrical tape.
- Remember that the ground wire is a protective measure, both for electrical devices and for people. Preferably choose products that include this connection.
- After splicing the cables, you can put on the decorative cover which usually includes all electrical devices, to cover the electrical connection.
- Once the installation is complete, you can restore electrical energy from the TDA and check that your lamp is working.
There. Once all these steps have been completed, you should enjoy your dinner under the warm light of your first electrical installation. Certainly, a small step for humanity but a big one for the egotheque. Of course, don’t let your smoke go to your head: the road to becoming a true snap master is long and often painful. For now, go ahead: feel enlightened.
*Prices for products in this item are updated as of May 22, 2023. Values and availability may change.
Source: Latercera
I’m Rose Brown , a journalist and writer with over 10 years of experience in the news industry. I specialize in covering tennis-related news for Athletistic, a leading sports media website. My writing is highly regarded for its quick turnaround and accuracy, as well as my ability to tell compelling stories about the sport.